Changing Nameservers and Pointing Your Domain to a New WordPress Hosting Provider
If you’re considering switching WordPress hosting providers and need to change your domain nameservers, don’t worry. The process is simpler than it may seem. Follow these step-by-step instructions to easily update your domain nameservers and point your domain to a new host:
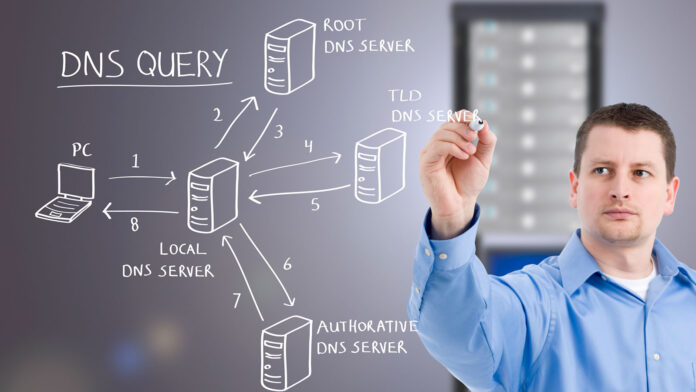
- Understand Nameservers: Nameservers are vital components of the global domain name system. They direct computers to the location of a specific website. Think of them as the address book for your website.
- Determine the Nameservers: Find out the nameservers provided by your new WordPress hosting provider. They are typically shared in the welcome email or available in your hosting account’s control panel. You may have two or more nameservers to enter.
- Log in to Your Domain Registrar: Access your domain registrar account, where you originally registered your domain.
- Locate DNS Settings: Look for the option to manage DNS settings or nameservers within your domain management area. It might be labeled differently depending on your registrar.
- Update Nameservers: Choose the option to update your domain’s nameservers.
- Enter New Nameserver Details: Enter the new nameserver information provided by your new hosting provider into the appropriate fields. Ensure accuracy when typing the nameservers.
- Save Changes: Save the changes to update your domain nameservers.
- DNS Propagation: Keep in mind that DNS propagation can take some time. It typically ranges from a few minutes to a few hours, although it can occasionally take up to 48 hours. During this period, your website may experience intermittent accessibility as the new nameserver information spreads across the internet.
That’s it! You have successfully changed your domain nameservers and pointed your domain to a new WordPress hosting provider. Remember to test your website after DNS propagation is complete to ensure everything is functioning correctly.
If you encounter any difficulties during the process, reach out to your domain registrar’s support team or consult the documentation provided by your new hosting provider for further assistance.
Why and When to Change Domain Nameservers
There are two main situations in which you may need to change your domain nameservers:
- Switching Web Hosting Providers: If you decide to change your web hosting company, you will need to update your domain nameservers. By doing so, you ensure that your domain points to the new hosting location. It’s crucial to make this change to avoid any disruption in website availability, as your old hosting provider may delete your files after your hosting plan expires.
- Adding a Web Application Firewall: Another reason to change nameservers is when you want to add a web application firewall (WAF) like Sucuri or Cloudflare to enhance your website’s security. A WAF protects your site from online threats and provides additional layers of defense. Changing your nameservers allows the WAF to handle your website’s traffic and protect it effectively.
In both cases, changing domain nameservers is essential to ensure that your website functions correctly and remains accessible to users. Failure to update the nameservers can result in your website being unreachable, causing inconvenience to your visitors.
How to Easily Change Domain Nameservers
Changing your domain nameservers is a simple process that may vary slightly depending on your domain registrar. Here, we will guide you through the general steps involved.
Why Change Nameservers? When implementing a web application firewall (WAF) like Sucuri or Cloudflare, you will be asked to point your nameservers to them. This is necessary for the WAF to protect your website by blocking attacks at the DNS level. Apart from this, you may rarely need to change nameservers, except for tasks like modifying DNS records for your professional email address.
Steps to Change Nameservers:
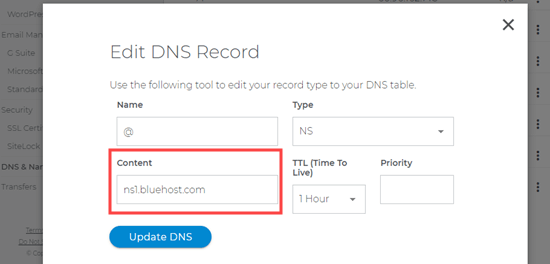
- Gather New Nameserver Information: Before proceeding, obtain the new nameserver records from your new web hosting provider. These records typically look like ns1.bluehost.com and ns2.bluehost.com, although some hosts use IP addresses instead.
- Changing Nameservers with Domain.com:
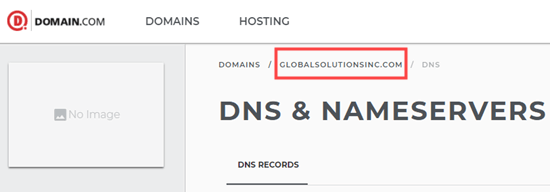
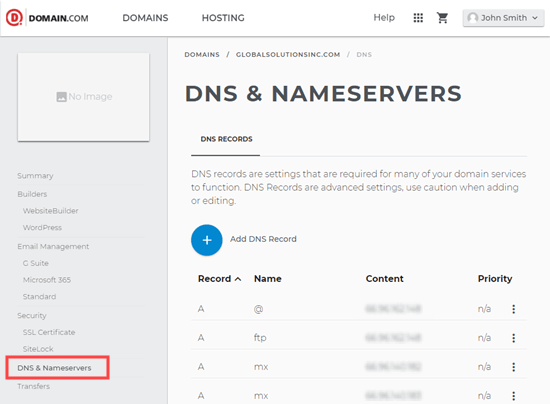
- Log in to your Domain.com account and go to “DNS & Nameservers” in the left sidebar.
- Select the correct domain and scroll down to the NS records.
- Click the three vertical dots next to the first nameserver, choose “Edit,” and enter the new nameserver.
- Repeat the process for the second nameserver.
- Verify that the updated nameservers are listed.
- Changing Nameservers with Bluehost:
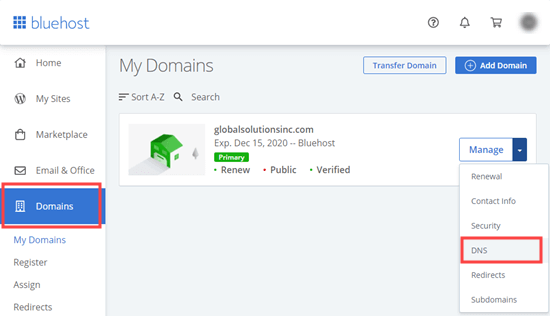
- Log in to your Bluehost account and navigate to the “Domains” tab.
- Locate your domain in the list and click the dropdown menu, then select “DNS.”
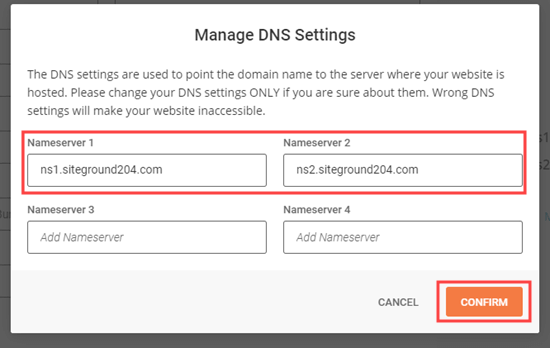
- Click the “Edit” button next to the nameservers.
- Choose the “Custom” option and enter the new nameservers provided by your new web host.
- Save the changes and verify the updated nameservers in the list.
These instructions provide a general overview of changing nameservers. The process may differ slightly depending on your domain registrar and hosting provider.
Note: It may take a few hours for the changes to take effect, so be patient if your website does not immediately reflect the new nameservers.
By following these steps, you can easily change your domain nameservers and ensure that your website points to the desired host.
Changing Your Nameservers with SiteGround
SiteGround is a renowned premium WordPress hosting company that also offers domain registration. To change your nameservers in SiteGround, follow these steps:
- Log in to your SiteGround account.
- Go to the Services » Domains page and click the “Manage nameservers” link for your desired domain.
- In the popup window, delete the existing SiteGround nameservers and enter the new ones you want to use. Optionally, you can add a third and fourth nameserver.
- Click the “Confirm” button to save your changes.
- Your new nameservers will now be displayed next to your domain name.
Congratulations! You have successfully changed your domain nameservers on SiteGround.
Changing Your Nameservers with HostGator
HostGator is another popular web hosting company and domain registrar. To change your nameservers on HostGator, follow these steps:
- Log in to your HostGator account.
- Click the “Domains” tab and select the name of your desired domain to view further details.
- Below your nameserver details, click the “Change” link.
- Two new boxes will appear for the nameservers. Enter your new nameservers in these boxes and click the “Save Name Servers” button.
- The boxes will turn green to indicate that the nameserver change has been saved. You will see your new nameservers in the domain overview.
Congratulations! You have successfully changed your domain nameservers on HostGator.
Changing Your Nameservers with GoDaddy
GoDaddy is a well-known hosting and domain name company. To change your nameservers in GoDaddy, follow these steps:
- Log in to your GoDaddy account.
- On the home page, locate your domains and click the three vertical dots for your desired domain.
- Select the “Manage DNS” option.
Please note that the instructions provided are a general guide, and the process may vary slightly depending on your specific domain registrar.

Next, select the “I’ll use my own nameservers” option in GoDaddy and enter the desired nameservers. You can add more than two nameservers by using the “Add Nameserver” button. After entering the nameservers, click the “Save” button. GoDaddy may display a warning prompt; simply check the box and click “Continue” to confirm the changes.
Congratulations! You have successfully changed your nameservers on GoDaddy.
Changing Your Nameservers with Namecheap
Namecheap is a reputable domain name company known for its value offerings. To change your nameservers on Namecheap, follow these steps:
- Log in to your Namecheap account.
- Click the “Domain List” tab and select the “Manage” button next to your desired domain.
- Scroll down to the “Nameservers” section and choose the “Custom DNS” option from the dropdown list.
- Add your nameservers and click the “check” button.
- Your new nameservers will now be displayed in the list.
Congratulations! You have successfully changed your nameservers on Namecheap.
Changing Your Nameservers with WordPress.com
WordPress.com is a hosting service provided by Automattic, the company behind WordPress. If you need to change your nameservers on WordPress.com, follow these steps:
- Log in to your WordPress.com account.
- Go to the My Sites » Upgrades » Domains page and select the domain you want to change.
- From the list of actions, choose “Change Your Name Servers & DNS Records.”
- Toggle the “Use WordPress.com Name Servers” switch off.
- Enter your desired nameservers and click the “Save Custom Name Servers” button.
That’s it! Your website domain is now pointed to your new host.
After making nameserver changes, it may take a few hours for them to take effect globally. It requires internet service providers to update their cache and IP address records. If the changes are not reflected immediately, be patient. You can also try flushing your DNS cache on your computer.
We hope this article has helped you learn how to change nameservers and point your domain to a new host. For more helpful resources, check out our recommended WordPress plugins and our comparison of the best email marketing services.
Don’t forget to subscribe to our YouTube Channel for WordPress video tutorials, and follow us on Twitter and Facebook.


